
So, I don’t know about you, but I absolutely love the idea of having a nice leather Midori Traveler’s Notebook, but I’m not ready to commit to the cost of the artisan-ship of a nicely made one. Believe me- I’ve already got my list down of which companies I want to buy from, which product, color, size, add-ons, etc., but at the moment, my “mad money” cash is low.
So I’ve been racking my brain about how I could make a traveler’s notebook from materials I already have. I’ve seen one blogger who made a traveler’s notebook from an old faux leather handbag she no longer used. GREAT idea! However, I don’t have such a bag.
So what I’ve done is taken an partly chewed up (on behalf of our first dog way back, 4 years ago) oilcloth zipper pouch that could hold letter-size documents, and I have made it into a my very own brightly colored traveler’s notebook! I am so excited to share this with y’all.


I wanted to show you what the zipper pouch looked like before it was chewed up, so above is a picture of another oilcloth pouch I still have intact. You can see about what size it is where I show it with letter-sized paper. Also, the inside oilcloth is different than the outside. You’ll see the same thing in the damaged pouch I used below.


So, first I seam-ripped all of the stitching out of the pouch, including the zipper. Previously I have purchased a cheaper midori from Michael’s called the Recollections Traveler’s notebook (see a review of this product done by Pretty Prints and Paper here). This was the size I wanted my traveler’s notebook to be, but I also wanted to make it a little wider, so it could hold a few more notebooks.
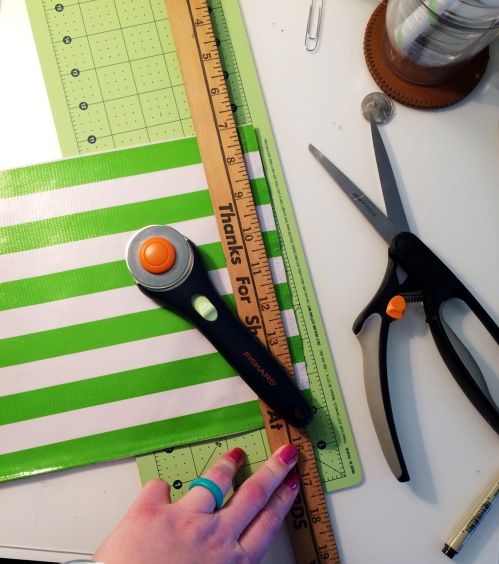
I cut the oilcloth down to the size I needed, using the Recollections notebook as a guide, plus, I used 4 May Designs books to measure how much wider I needed to make it.


After getting it to the size I wanted, plus about 1/2 in. for seams, I flipped the fabric inside-out, used binder clips to hold it in place, and put in seams on the top and bottom of the fabric. (I used binder clips, rather than straight pens- what I’d normally use in sewing projects – so that I didn’t make unnecessary holes in the oilcloth).

Once I was done stitching the top and bottom seams, I flipped the fabric right-side-out. Since the oilcloth is pretty stiff, compared to most other fabrics, I knew I’d need to run a seam along the outside of the same seams I’d just sewn to keep it from bubbling and folding it on itself.
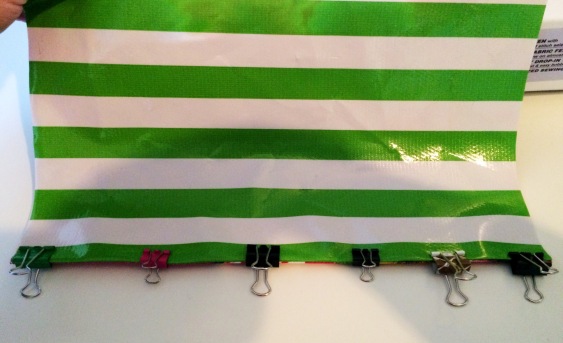
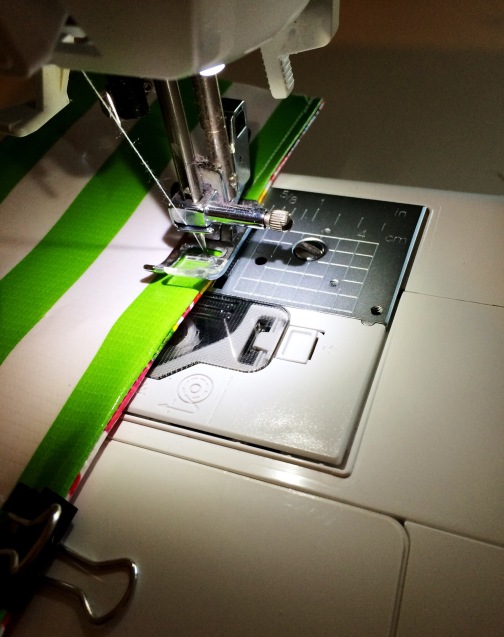
Again, to keepthe fabric lay flat while I ran it through my sewing machine, I used binder clips. (You can see that as I ran it through my sewing machine, I had to remove each binder clip before it reached the needle).
After I was done with the top and bottom edges, I sewed a seam down the side edges.
Note: This means that the sides are raw edges of the cut fabric, as opposed to the hidden edges of the top and bottom seams. If you’re making your own, and you don’t like raw edges, you could tuck the side edges in, binder clip them, then run them through your machine. I don’t mind the raw edges of oilcloth, since the fabric doesn’t fray like other fabrics might.


After the sewing was done, all that was needed what to punch holes and string the notebook with elastic. I used my 1/8 inch hole punch to punch the holes.
The get the hold in the center for the “keep it together” band, I basically scrunched my fabric into the hole punch, where I was able to make enough of an impression of a punch that I was able to pick the rest of the hole out with my sewing scissors. (If you want more precision for this, you may want to use a tool like a screw punch- I do not own one, so I made do).
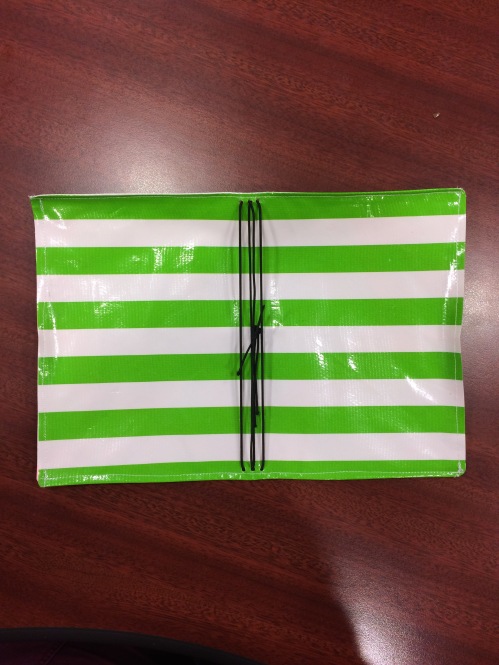
This is what the notebook looked like after I strung it with elastic.
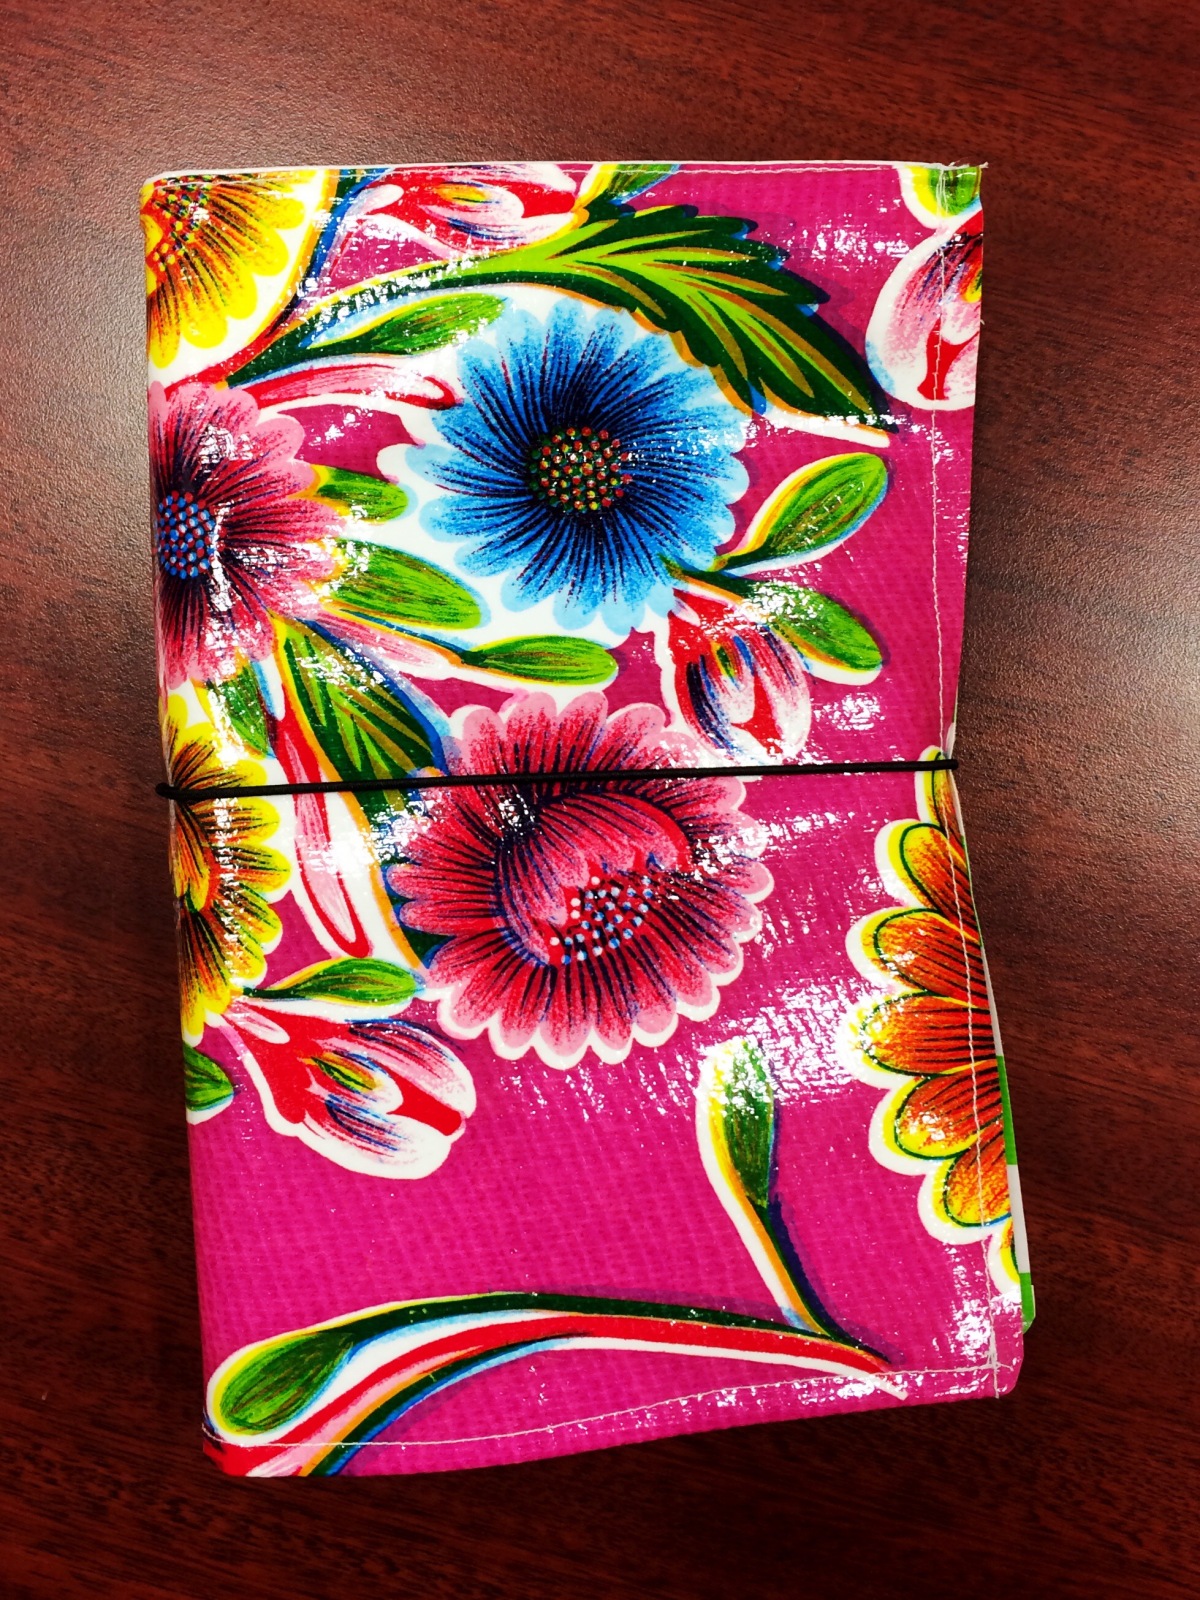
To create a finished touch, I took my scissors and rounded the corners.
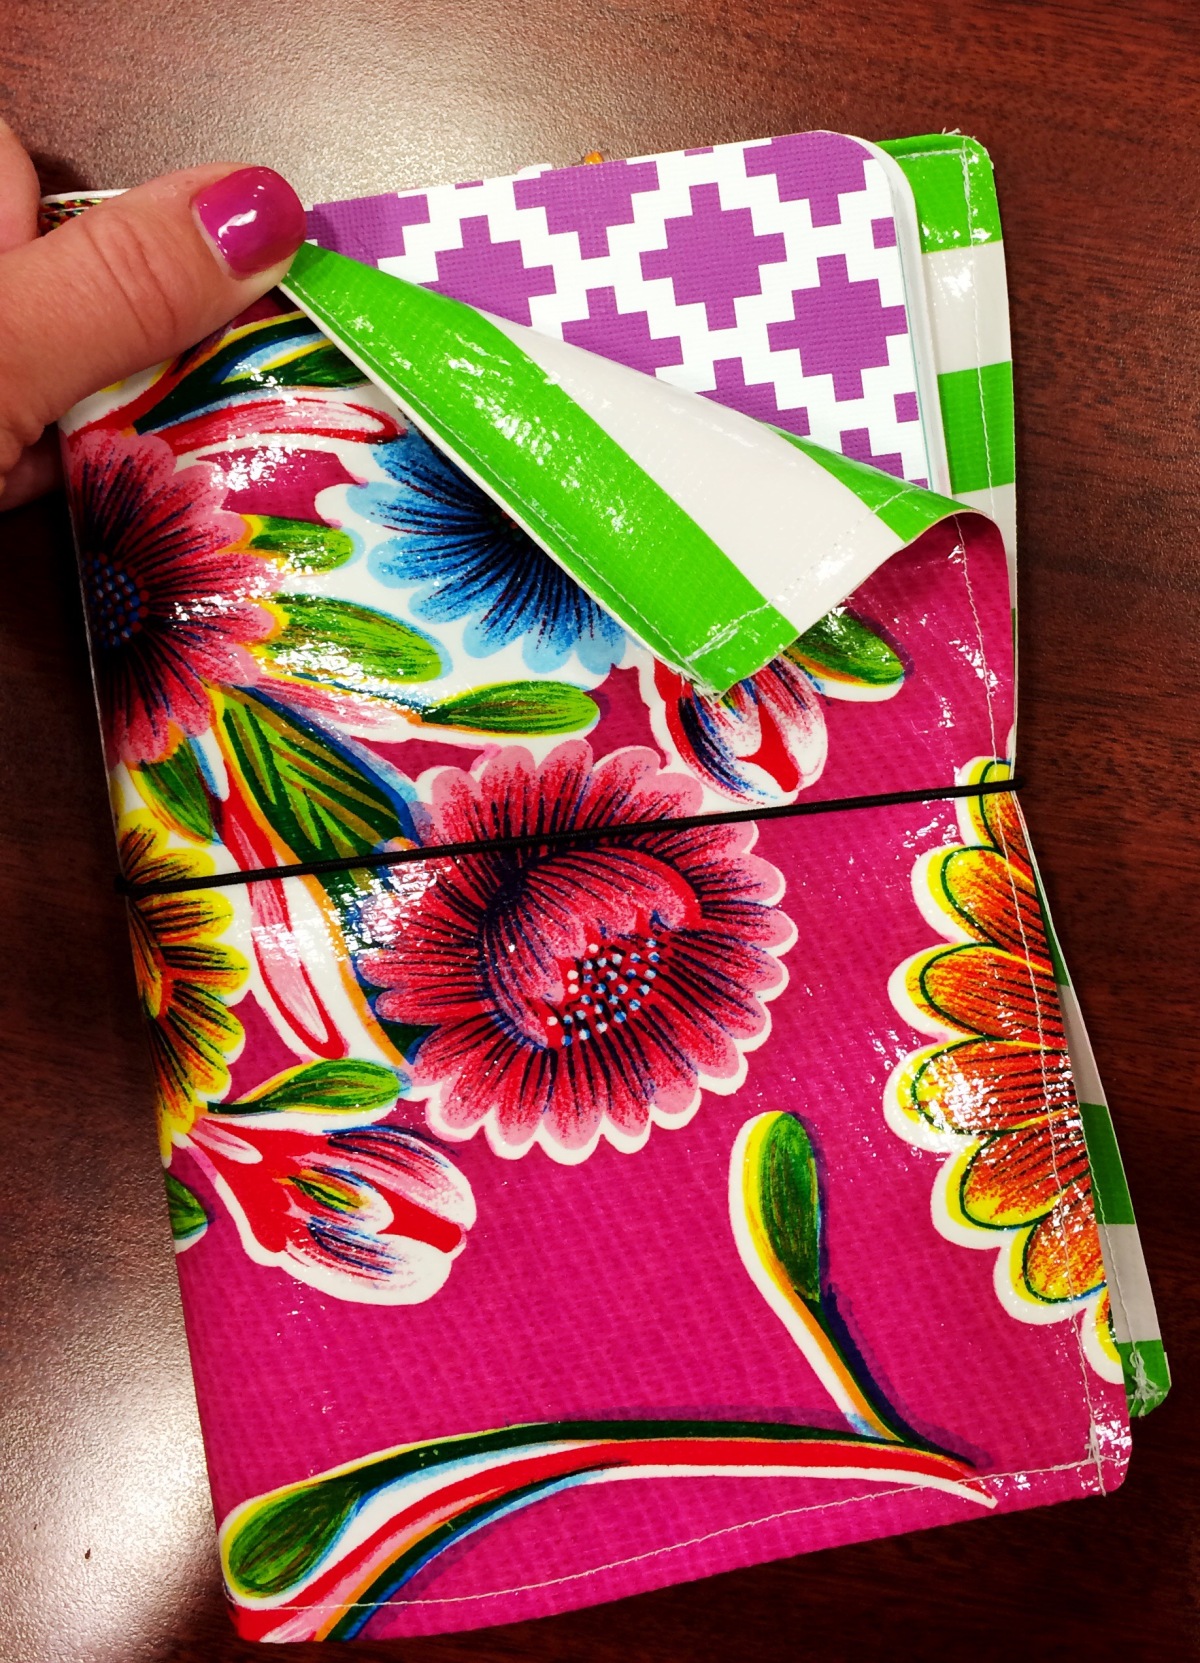
I’m pretty pleased with the final product, especially since it’s the first one I’ve made! I love the idea that it can be reversible too.
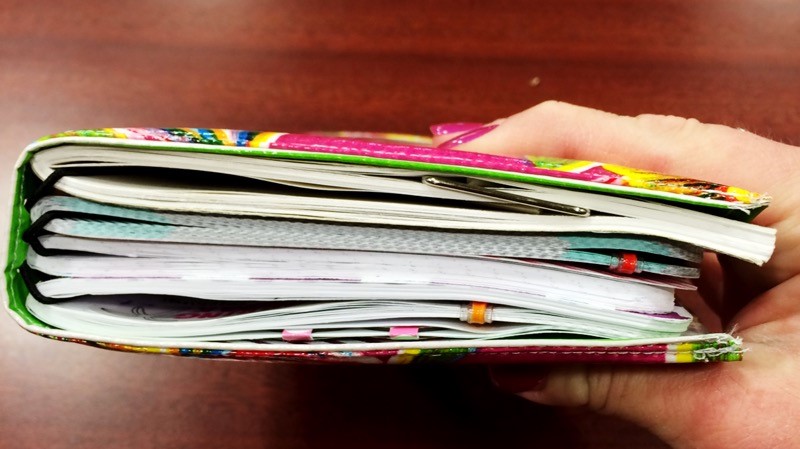
You can see that the finished product holds 4 May Designs-type books very nicely. I love the bright colors of the oilcloth, and the added benefit that it is water proof!
Let me know if you’ve made a DIY traveler’s notebook before, and how you’ve done it. I’d love to see pics!
Thanks for joining me on the Diligent Journey!

Wow! Ingenius idea! I wish I could use a sewing machine 🙂
LikeLiked by 1 person